
Interfacing Capacitive Soil Moisture Sensor with Arduino Electronics 360
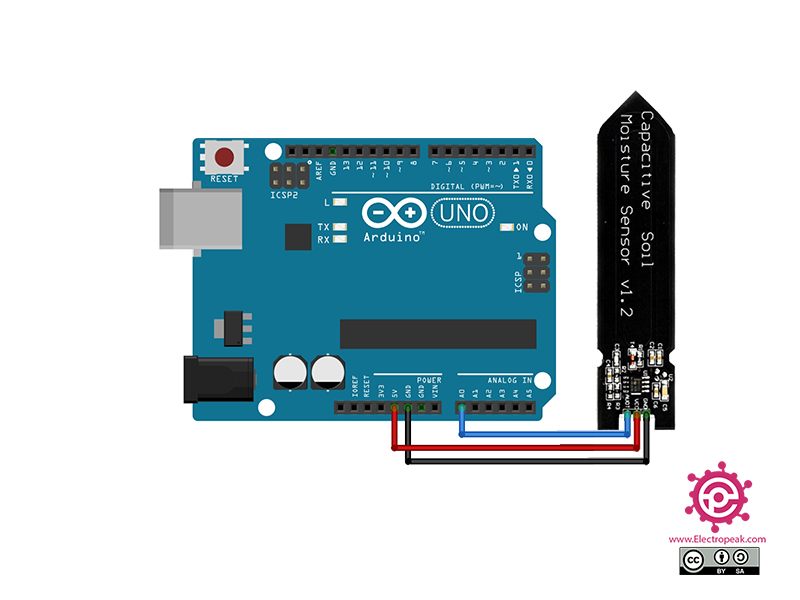
Capacitive soil moisture sensors exploit the dielectric contrast between water and soil, where dry soils have a relative permittivity between 2-6 and water has a value of roughly 80.. Below is the diagram for wiring the soil moisture sensor to the Arduino Uno board: One thing to note is that the capacitive soil sensor uses 3.3V as its supply.
Capacitive Soil Moisture Sensor Arduino Circuit diagram and programming
temperature sensor and SEN92355P moisture sensor are selected and integrated through an Arduino UNO controller and a mechanism to pic k and place them. A back and forth strategy is proposed for.

Interface Capacitive Soil Moisture Sensor v1.2 with Arduino
Capacitive moist sensor. For our Arduino we are going to use another moisture sensor: the capacitive moisture sensor . On this sensor you see 1.2, there is also a version with 2.0. You can use both, it doesn't matter for this lesson. This sensor works in a different way than the traditional sensor mentioned earlier. The capacitive moisture.

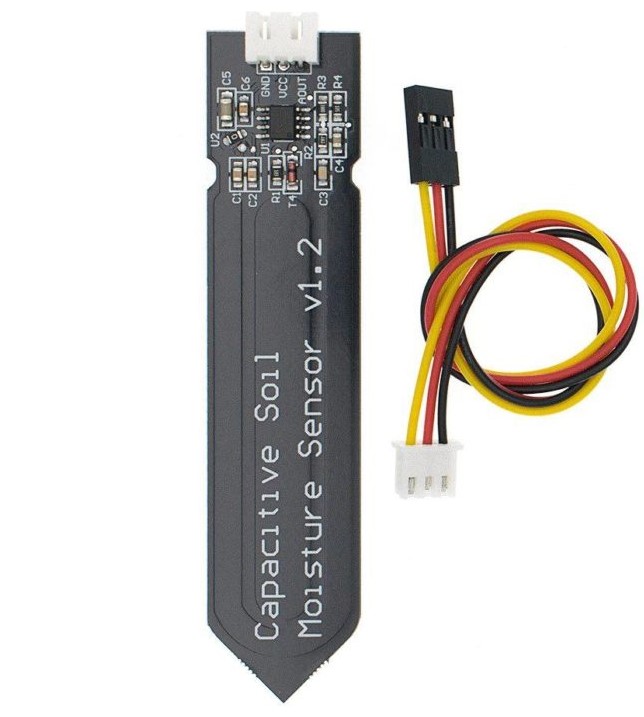
Capacitive soil moisture sensor V1.0 For Arduino / Raspberry Pi
Wiring a Capacitive Soil Moisture Sensor to an Arduino. Connecting a capacitive soil moisture sensor to an arduino is a breeze. You only need to connect three wires. Start by connecting the sensor's red wire (VCC) to the power supply, 3.3V-5V is fine. Use the same voltage that your microcontroller logic is based off of. For most Arduinos.
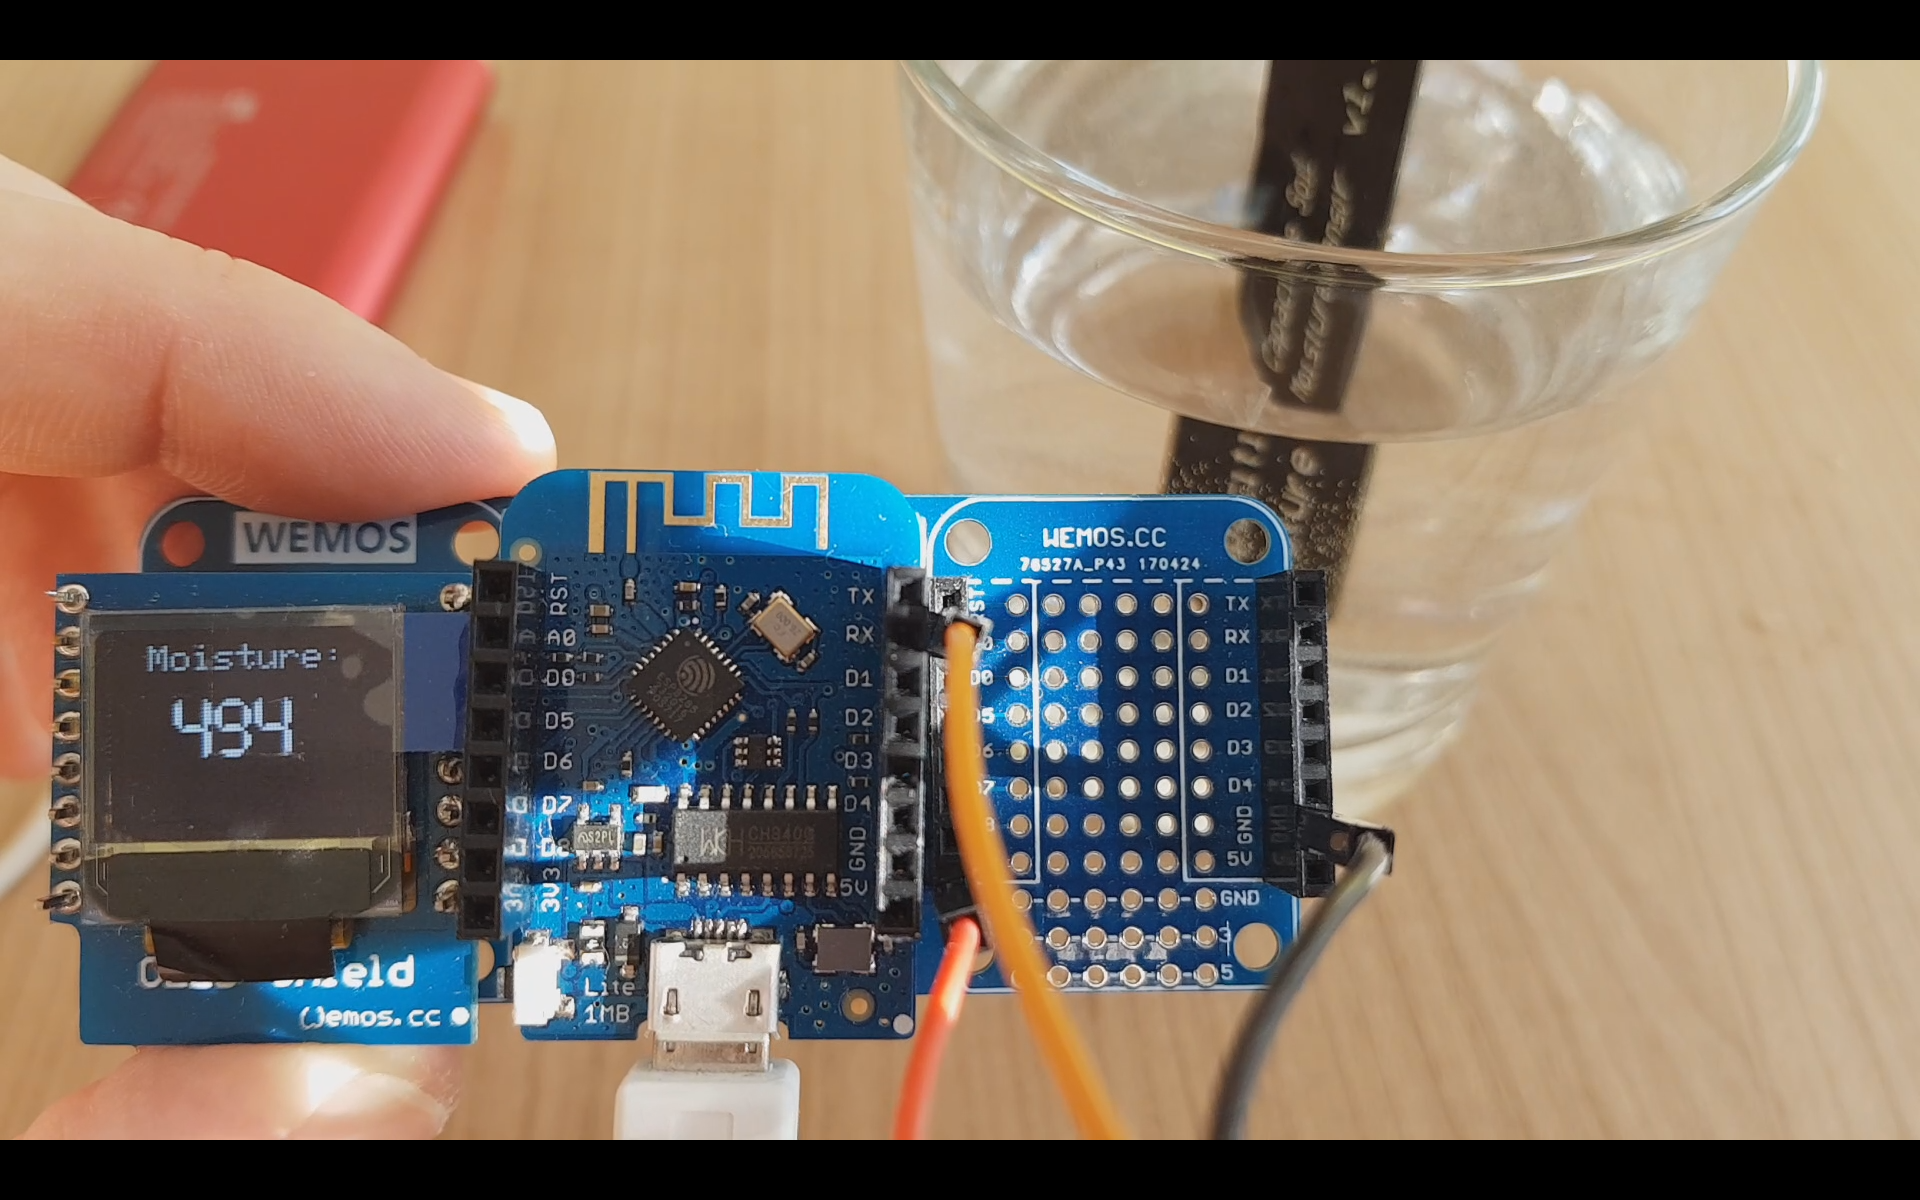
Capacitive Soil Moisture Sensor v1.2 with Wemos D1 Lite (Arduino IDE) ESP8266 Maker Pro
The capacitive soil moisture sensor does not measure moisture directly but measures the changes in capacitance caused by the changes in the dielectric contrast between water and soil.. In the first part of the script we define the analog pin that connects the microcontroller with the soil moisture sensor. For the Arduino and ESP8266 we use.
How to Use Soil Moisture Sensor Capacitive V2.0 Module With Arduino Probots Blog
Interface Capacitive Soil Moisture Sensor with Arduino & 16X2 LCD Display. Now lets interface the Capacitive Soil Moisture Sensor with Arduino & LCD Display and display the analog value or soil moisture value in percentage. The circuit diagram for this is very simple. Connect the VCC pin to 3.3V of Arduino and GND to GND.
How to Use Soil Moisture Sensor Capacitive V2.0 Module With Arduino Probots Blog
The capacitive soil moisture sensor allows you to measure the moistness of soil. The biggest advantage over a traditional moisture sensor is that the capacit.

Interface Capacitive Soil Moisture Sensor v1.2 with Arduino
sensor node monitors several soil parameters such as pH, turbidity, soil moisture, and temperature based on Wi-Fi technology and sends the sensor information to the end-user . Sensors 2022 , 22.

SoilWatch 10 Arduino Capacitive soil moisture sensor YouTube
Code Explanation. This Arduino code is used to interface a capacitive soil moisture sensor with an Arduino microcontroller. The code consists of two calibration data variables, OpenAirReading and WaterReading, which are used to calibrate the sensor readings. The setup () function initializes the serial communication at a baud rate of 9600 bps.
Interfacing Capacitive Soil Moisture Sensor with Arduino Electropeak
Laboratory Calibration and Performance Evaluation of Low-Cost Capacitive and Very Low-Cost Resistive Soil Moisture Sensors Sensors , 20 ( 2 ) ( 2020 ) , p. 363 , 10.3390/s20020363
Capacitive Soil Moisture Sensor v1.2 With Arduino Tutorial DIY Projects Lab
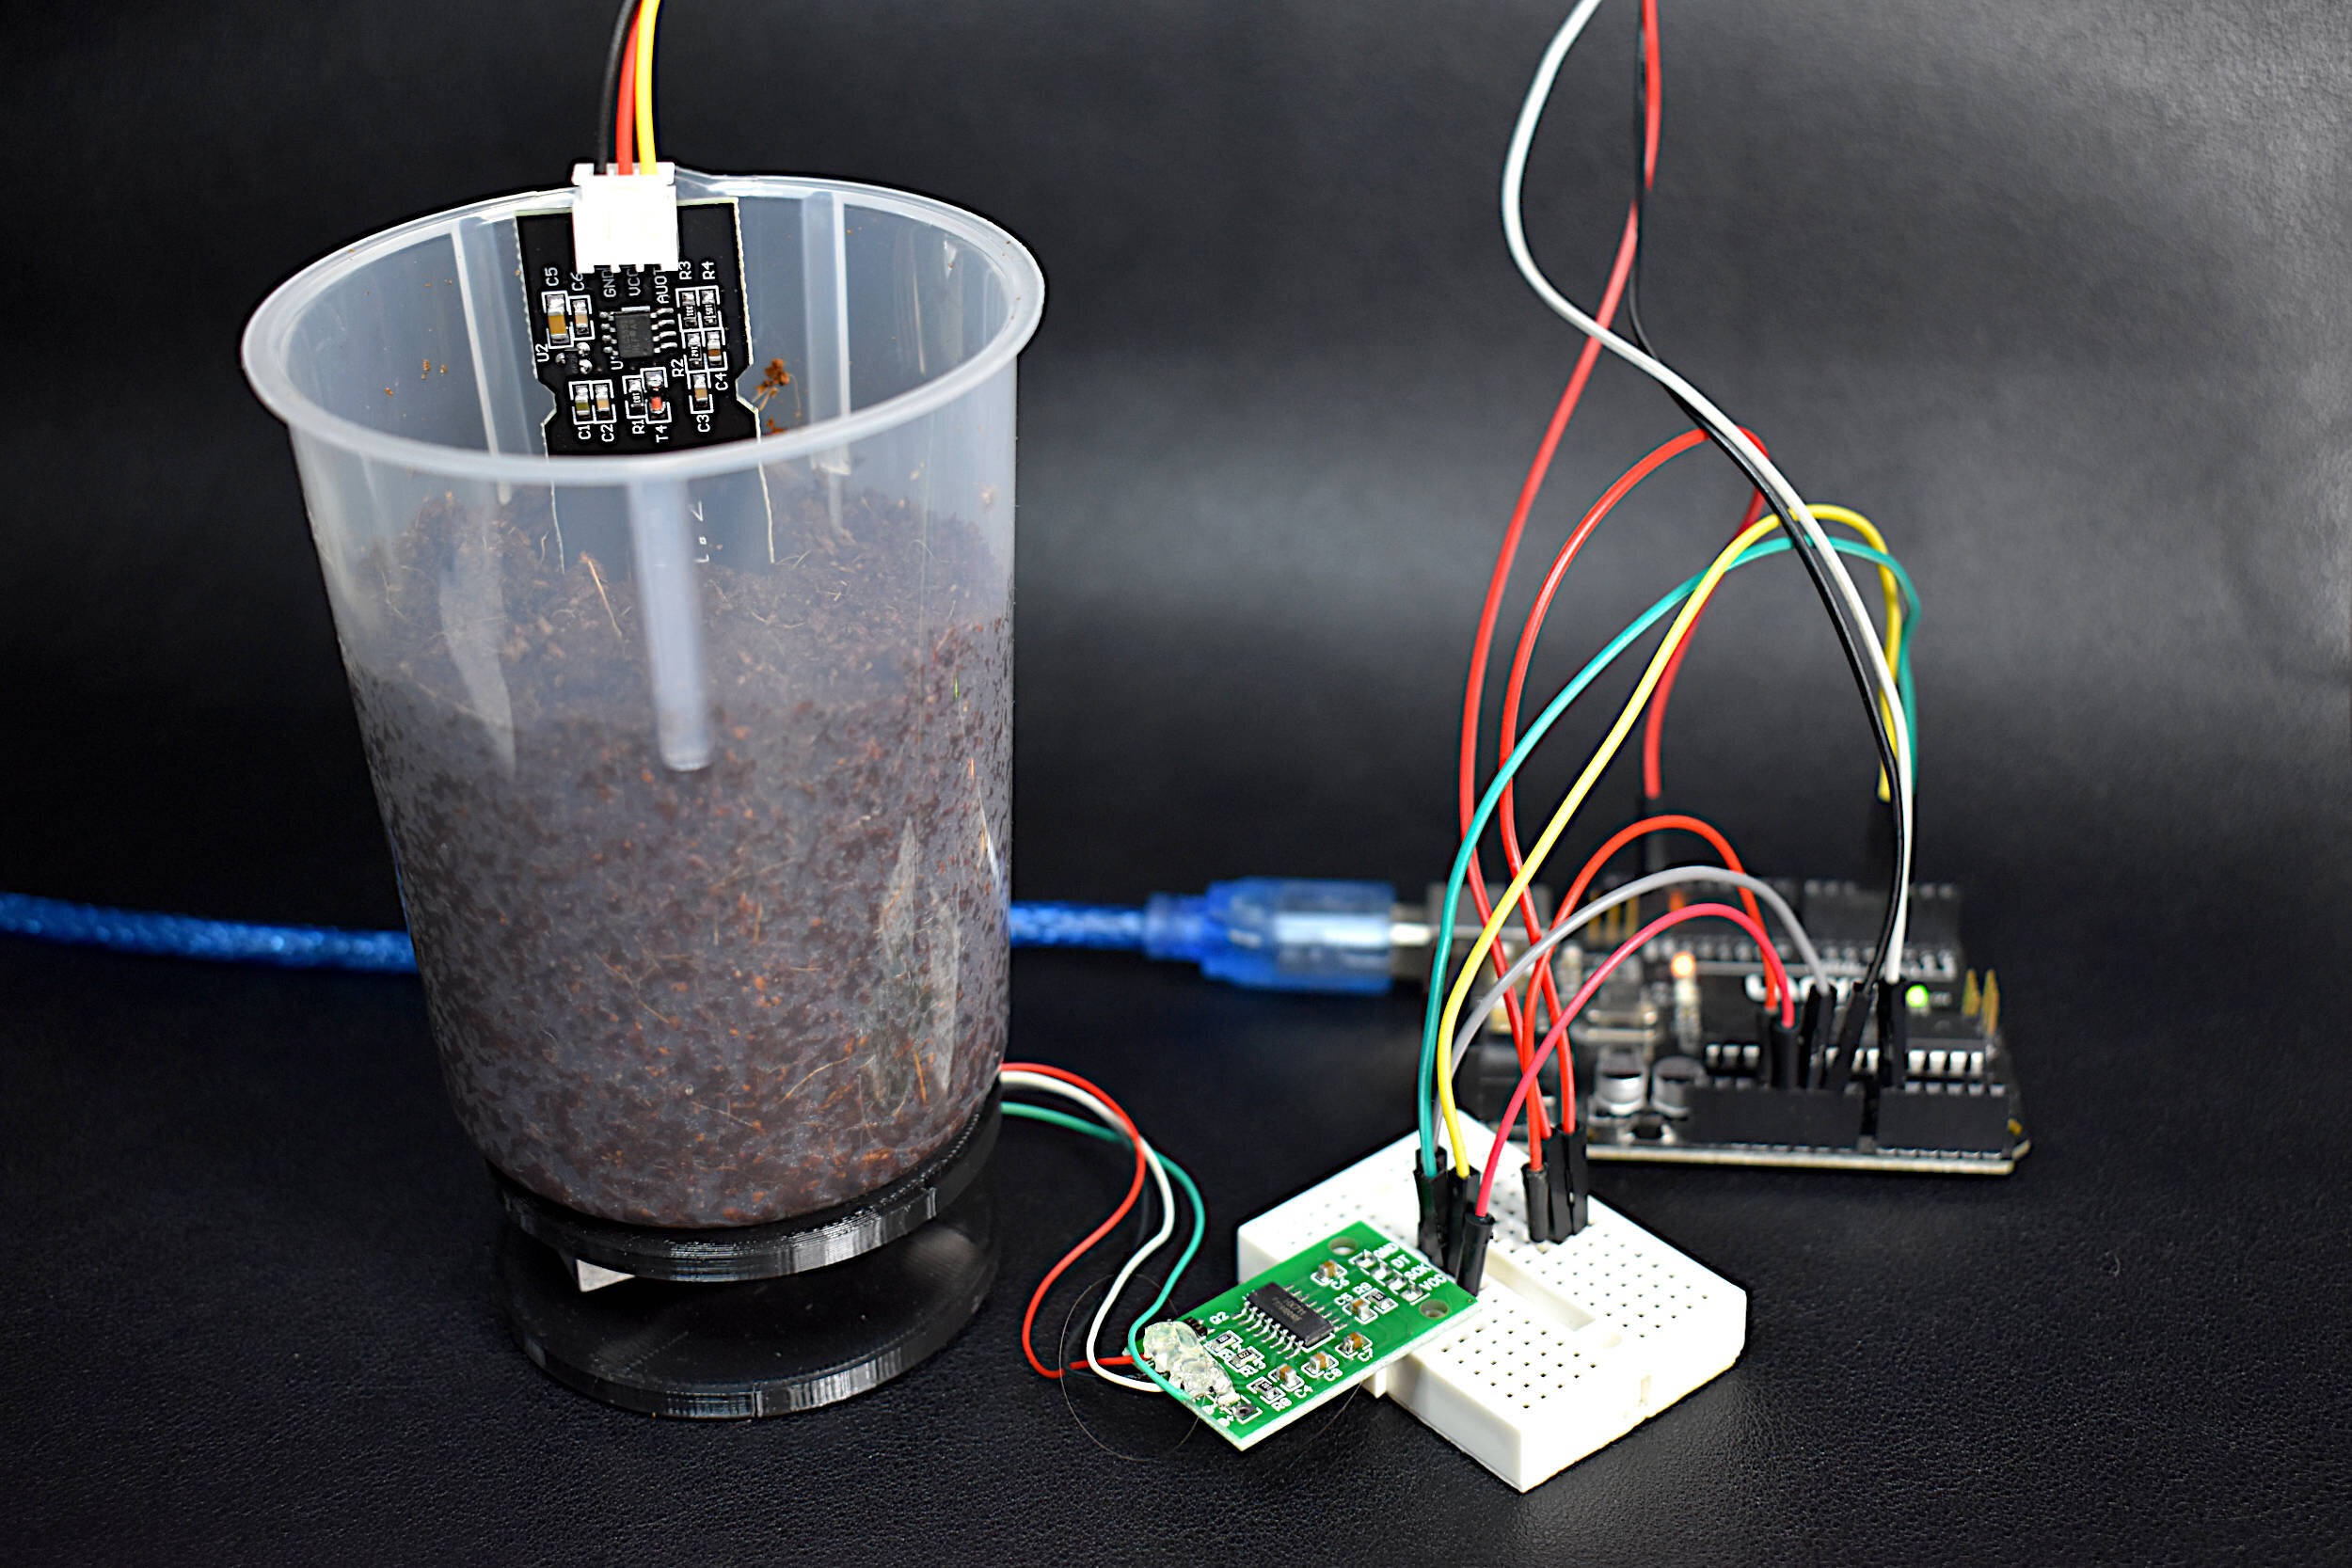
It depends on the soil's composition and water. In practice, we need to do calibration to determine a threshold that is a border between wet and dry. How to do calibration: Run the above code on Arduino. Embed the moisture sensor into the soil. Embed the moisture sensor into the soil. Pour water into the soil slowly.

How to Use Soil Moisture Sensor Capacitive V2.0 Module With Arduino Probots Blog
Hello, I´m trying to get a programm to run but it doesn´t reads the capacitive soil moisture sensor properly. It starts at around 800 and is counting up until 1017. Nothing changes if I hold it inside water. I used following websites programm and changed the analog input to A1 (because in my simple programm the sensor is reading correctly on this Input). -Yes I made the change with grounding.
Capacitive Soil Moisture Sensor Arduino Circuit diagram and programming
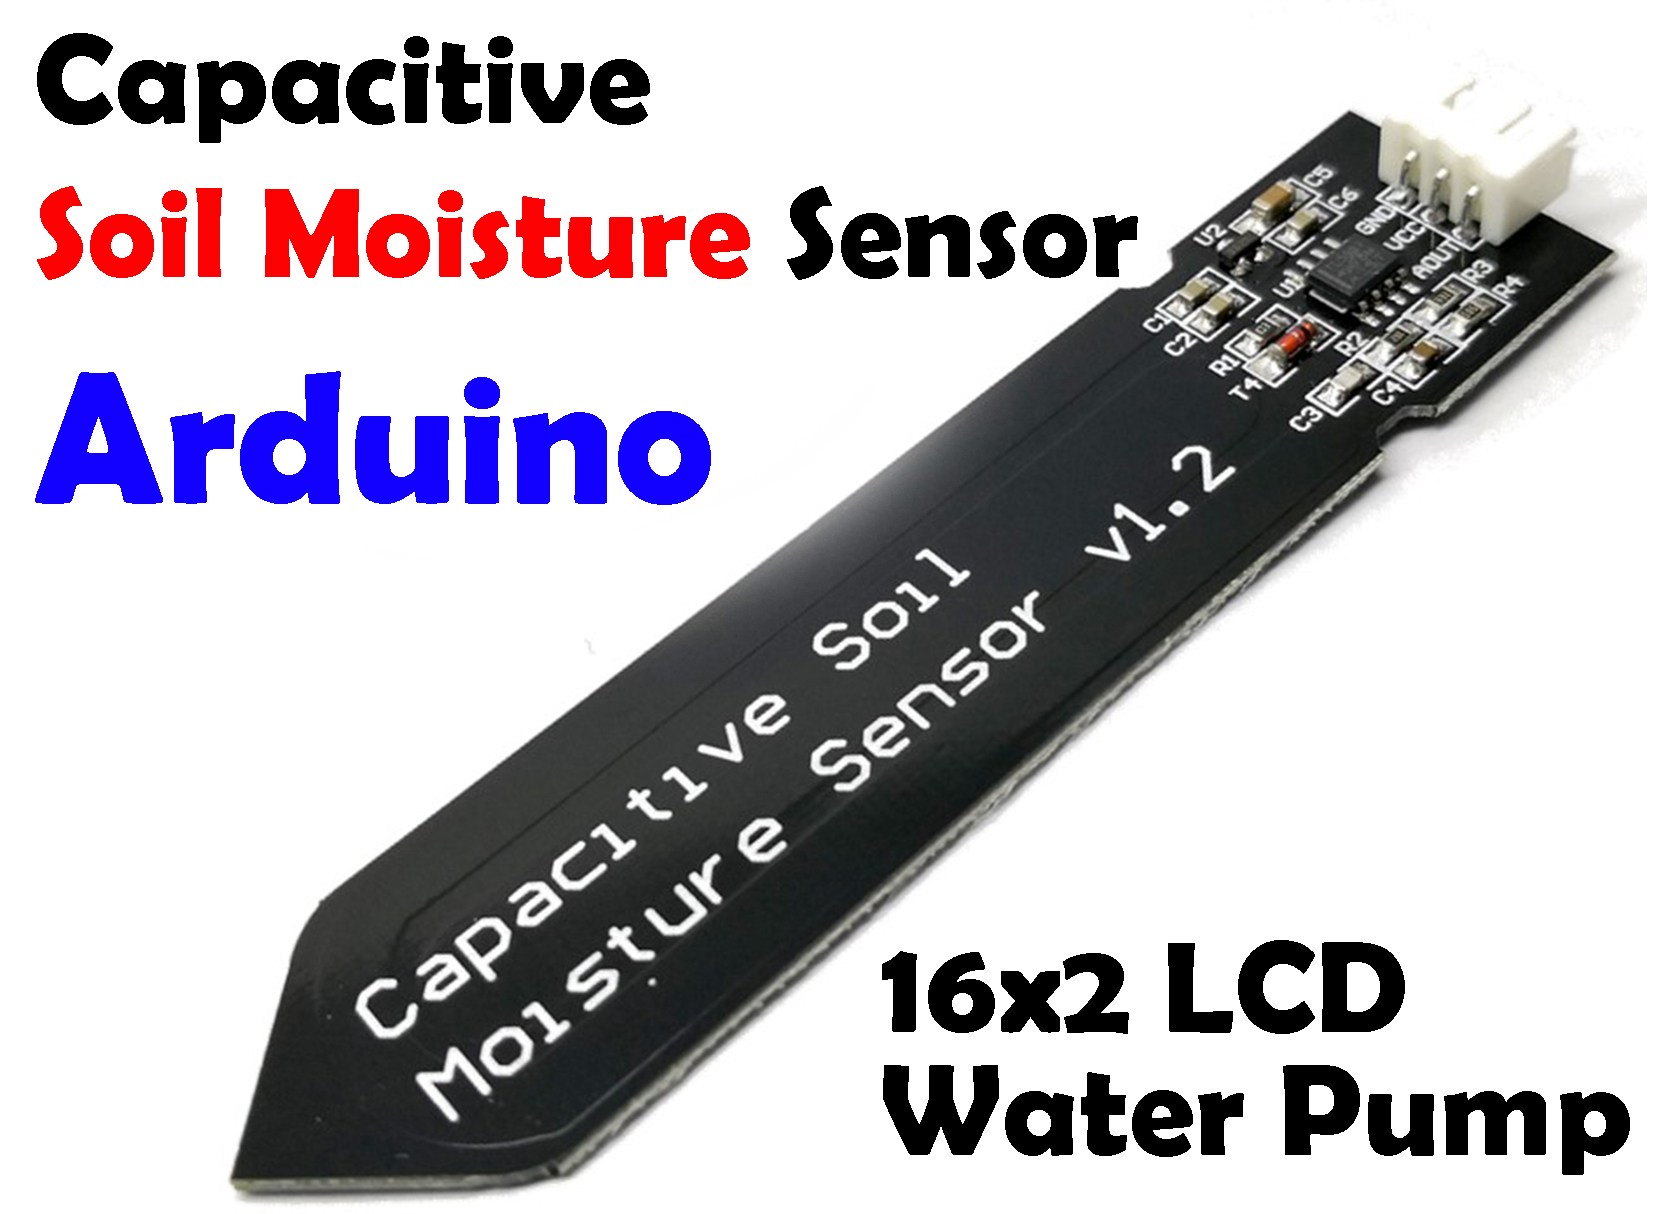
Description: Capacitive Soil Moisture Sensor Arduino - In this tutorial, you will learn how to use the Capacitive Soil Moisture Sensor v1.2 with Arduino and display the Soil Moisture value on a 16×2 i2c LCD module. The soil moisture is monitored in real-time. A 12volt dc water pump is controlled as the soil moisture increases or decreases.

Capacitive soil moisture sensor v1.2 Arduino code Step by step instructions SriTu Hobby
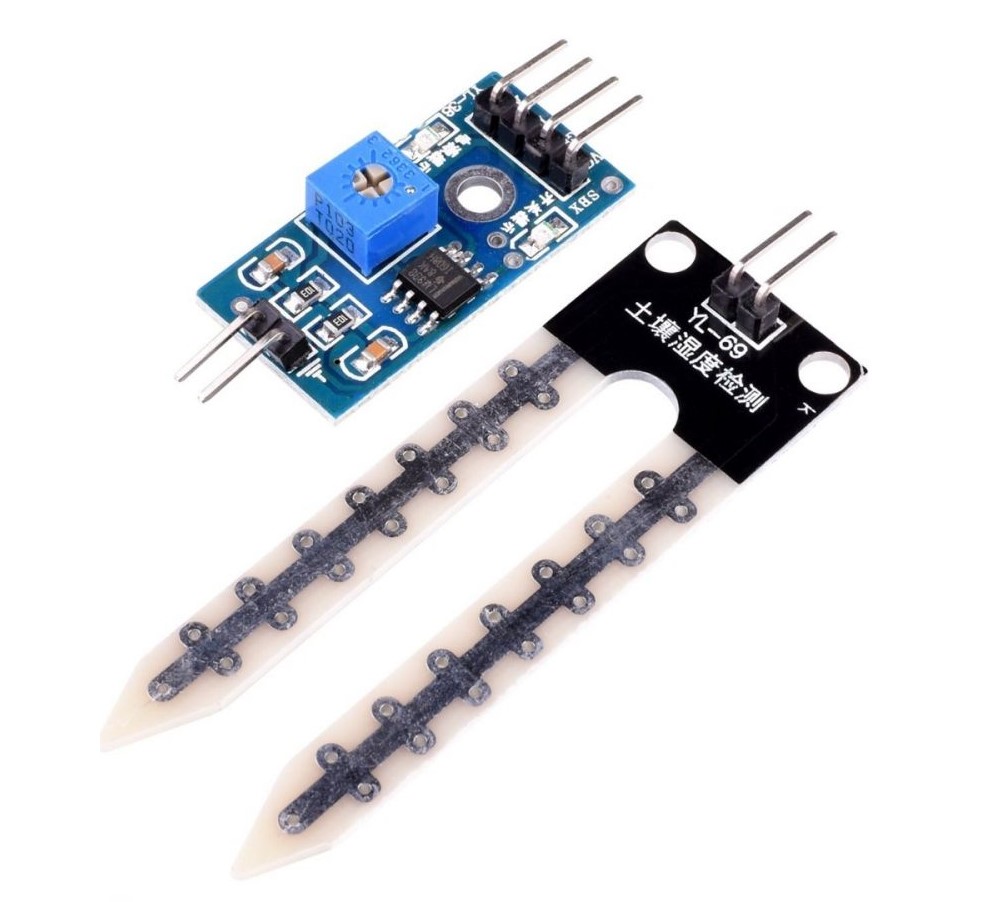
The soil moisture sensor consists of two probes that measure the volume of water in the soil. The two probes allow the electric current to pass through the soil and, according to its resistance, measures the moisture level of the soil. When there is more water, the soil conducts more electricity, which means that the resistance will be less.
Capacitive Soil Moisture Sensor Calibration with Arduino — Maker Portal
Step 4: Connect the Power Pins to supply the capacitive soil moisture sensor. Connect the Sensor pin labeled "+" to the Arduino 5 V pin. The right selection of voltage ensures that the analog signal is interpreted in the right way. If you use Arduino UNO, connect the "+" pin to the 5V pin on the Arduino UNO.
Capacitive soil moisture sensor arduino Mauro Alfieri Tutorial Arduino
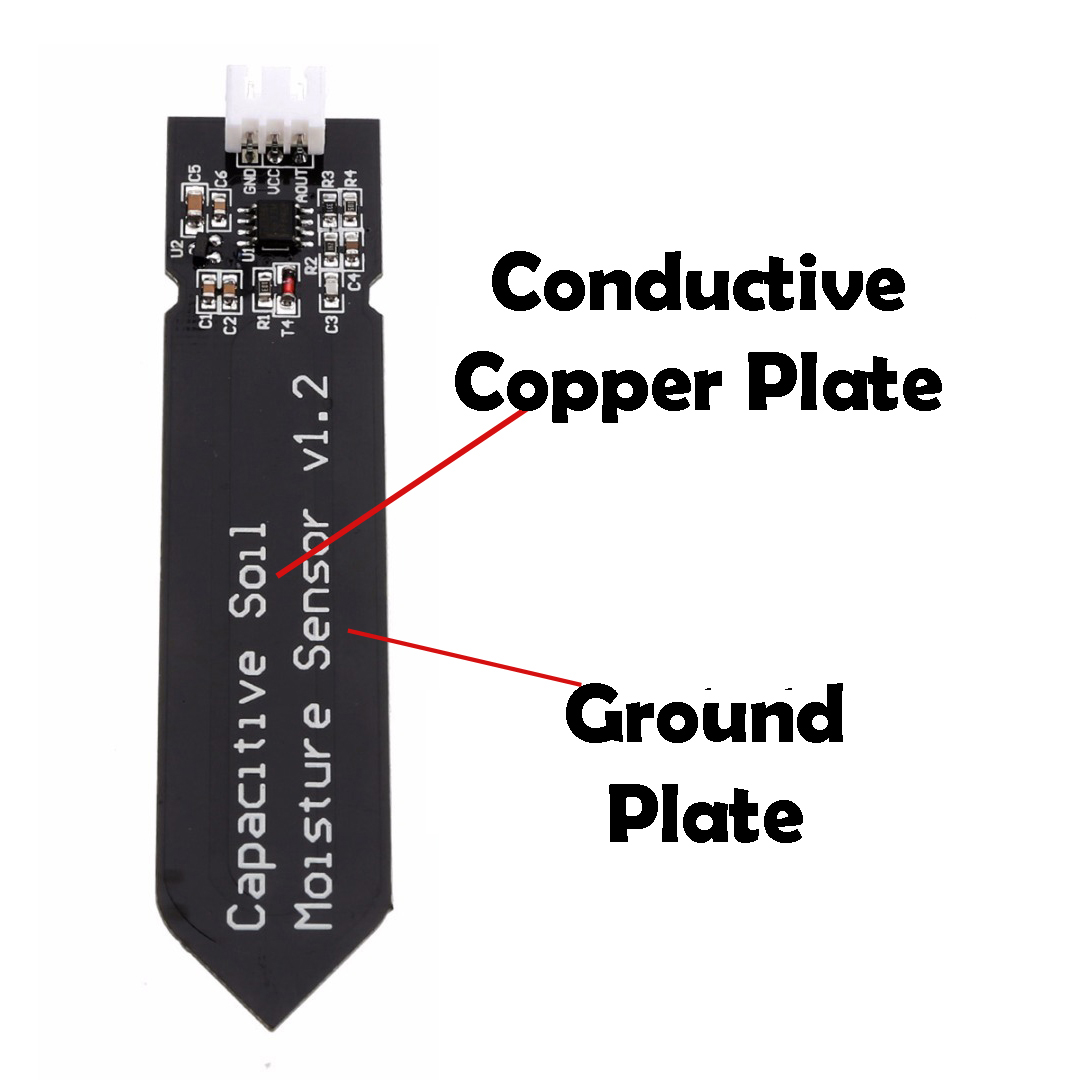
Capacitive Soil Moisture sensor v1.2 and its advantages: As the name indicates capacitive moisture sensor is a sensor which senses the moisture in the soil, the moisture in the soil can be measured using two methods resistive and capacitive, This v1.2 sensor uses capacitive method instead the resistive method which was used in the previous.
- Apartamentos Sun Suite Royal Puerto Rico Gran Canaria
- Complejo Rural Puerto Mágina Parking
- Plan Maestro De Validacion En La Industria Farmaceutica Ejemplo
- Eyma Frutos Secos
- Como Coger El Bajo De Una Cortina Del Corte Ingles
- Ajustar Control De Ganancia Televes
- Los Coches Más Baratos Con Combustible Glp En Valencia
- Calendario 2022 Festivos Castilla Y Leon
- La Oreja De Van Gogh Abel Pintos
- Escribo Tu Nombre En Las Paredes De Mi Ciudad